


Description
More images and video available at the bottom of this page.
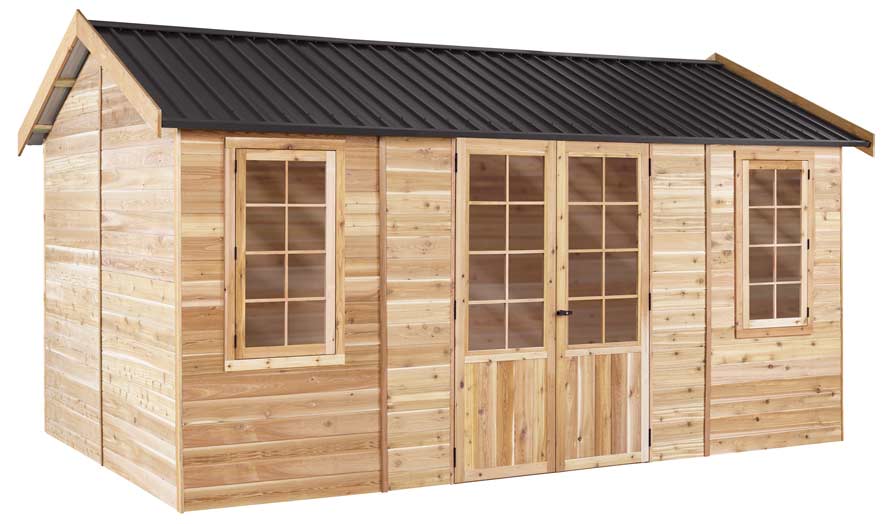
INCLUSIONS: The standard OAKLEY includes two opening windows and double doors.
Click for a pop-up image of the standard inclusions.
We can arrange installation for you in metro Adelaide, Brisbane, Melbourne and Sydney areas.
We offer trusted, qualified installers who are professional and conscientious.
Please check your postcode below to ensure we have an installer in your area before booking.
The best way to arrange your booking is to select your install options below before adding your studio or shed to the cart.
Add the options below that you require:
 | Sudio install Studio assembly, includes bolting to a slab if required. | |
 | 4.8x3m floor install Floor frame, yellowtongue and 75cm stumps. | |
 | Cedar roof lining install Backing installed, cedar cut to length & installed. | |
 | Annex deck install Floor frame, floorboards and 75cm stumps. | |
 | Annex roof install Roof frame, colorbond sheets and posts. | |
 | Extra door Door hung and gapped, per extra door purchased. | |
 | Packaging disposal Pallet & cardboard removed. | |
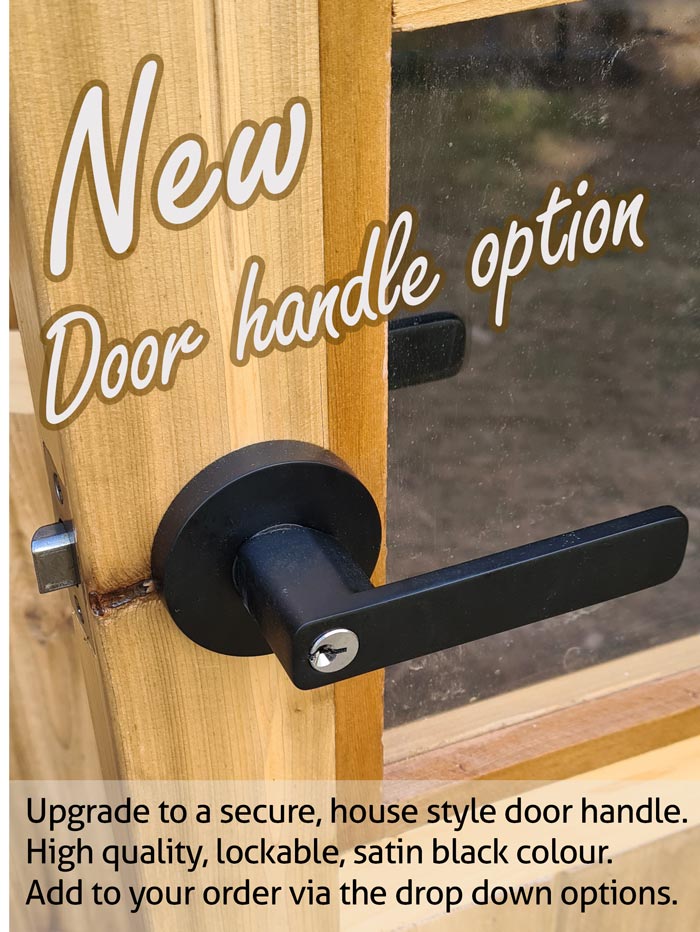
 | Entrance Lever Install |
IMPORTANT - by booking your installation with us, you agree to the following:
PRODUCT PLACEMENT: All items must be on the ground and in the area where assembly is to take place.
PARKING: Our Assembler will require parking, either on-site or nearby, for accessibility to the job site and cartage of job requirements.
MATERIALS: Your booking is for the stated services only; should further materials be required (outside of those included with the above), the services to apply or install these would be charged additionally. If needed, you have the option of either supplying yourself, from a list provided by our Assembler. Alternatively, our Assembler can source and supply all materials at cost + 20%, with receipts for all materials provided.
BREAKING GROUND: - Our Assemblers will always take exceptional care when breaking ground for any reason. However, it is the Customer’s responsibility to be aware of, and point out, any underground water pipes and/or cables.
CANCELLATION: As installers maintain a very tight schedule in order to provide a professional service to all customers alike, any cancellation must be done more than 48 hours before the install date please.
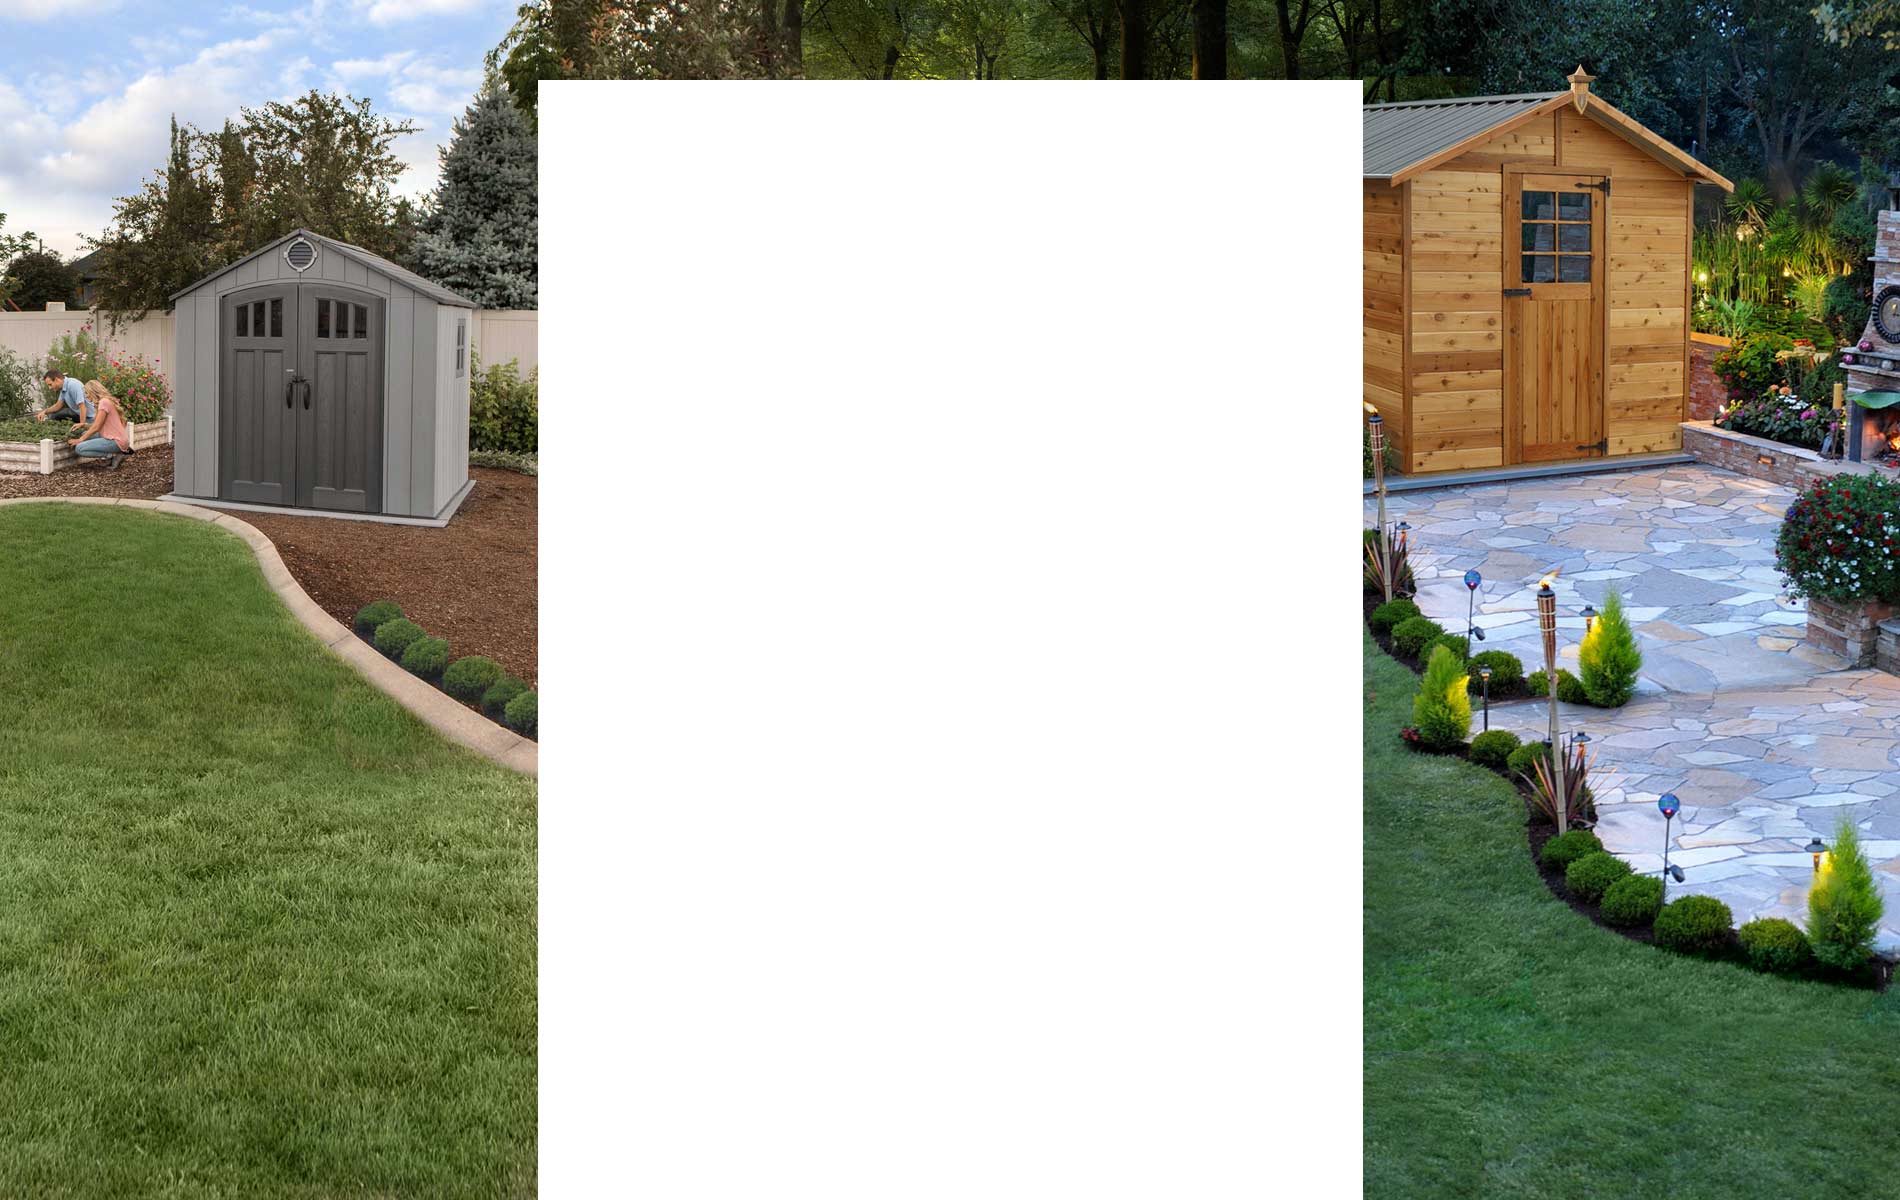
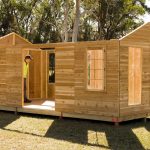
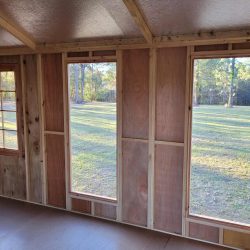
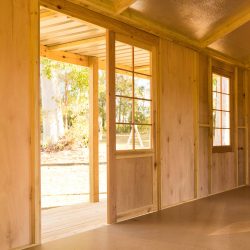
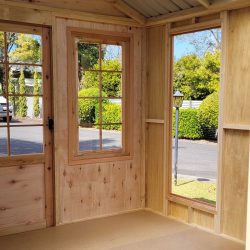
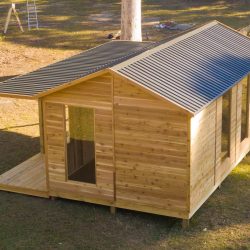
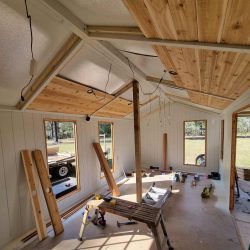
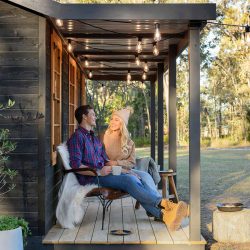
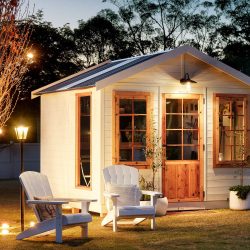
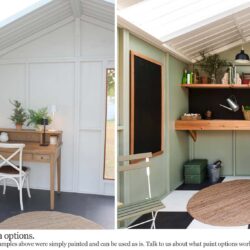
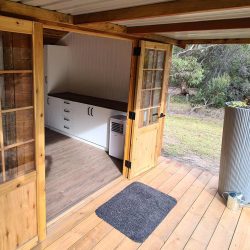
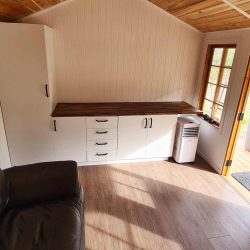
The OAKLEY STUDIO is designed to be an attractive addition to any property as well as providing a functional, long-lasting outdoor work space or hobby room. The OAKLEY STUDIO features a Colorbond gable roof with overhanging eaves, colonial style doors with tinted acrylic glazing and a locking T-handle. Twin Opening Windows are supplied as a standard feature. The wall panels consist of a 3 layer, “sandwiched” panel system – cedar then foil then hardwood ply with treated pine framing. This improves strength, insulation against moisture / heat plus gives a smooth surface on the inside of the studio making it easier to paint.
 Options including extra windows, extra doors, deck plus annex roof, as well as a full flooring kit are available. Talk to us about possible installers in your area also.
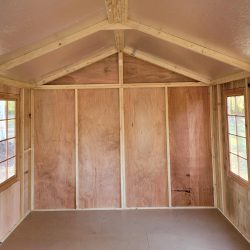
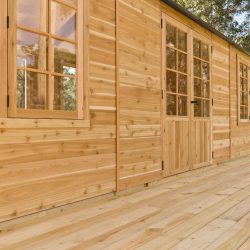
Our CEDAR STUDIO range is manufactured in Australia, and is constructed using 42 x 35mm termite resistant pine framing and 18mm thick Canadian Western Red Cedar VJ cladding with a Colorbond steel roof. The OAKLEY is supplied in an easy to assemble kit with pre-made panels. The panels come in raw timber (not stained or painted) allowing you to select the finish of your choice. Check the bottom of this page for more cedar coating information.
Typically time required for assembly is about 8 to 10 hours, excluding the floor. The unit can be sited on a concrete base or paved area, or a flooring kit can be used. Assembly is quite straightforward – the first step is to choose a nice level site in your yard. The floor is a base constructed either using a recommended HD floor or by laying a concrete slab. If the site is out of level the heavy duty floor kit will work well, this has been specifically designed to reduce site works where the ground is not level. Once the floor is in position the next step is to erect the pre-made walls. Starting at the front corner, the panels are joined and gables fastened into position. The roof is then assembled on the ground, lifted into position and fastened to the walls. Next the hinges are attached to the door, the door fastened to the wall and the door handle installed. Finally, the corner posts, cover strips, fascias and the ridge capping are attached to complete the product.
The OAKLEY STUDIO is supplied standard without a floor. A Heavy Duty Floor Kit is available as an optional extra, this includes tough, Yellow Tongue flooring sheets as the finished surface. The Heavy Duty Floor Kit provides for installation without the need for a prepared base such as a concrete slab or paved area.
The OAKLEY STUDIO features include:
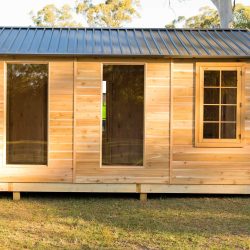
- Dimensions: 4848mm Wide x 3132mm Deep x 2600mm High (add 140mm for HD floor kit)
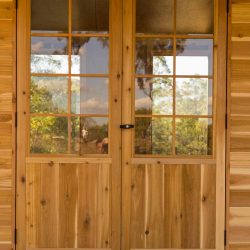
- Double colonial style glazed doors are standard
- Colorbond ‘MONUMENT’ roof panels
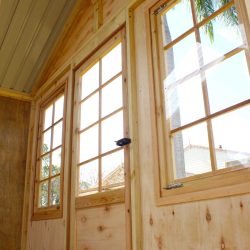
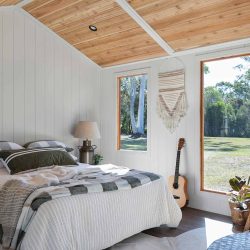
- Two Windows, 630mm opening with tinted acrylic glazing included standard
- Termite resistant pine 42mm x 35mm framing
- Wind rating: Cyclone rated! W60 / N4 / C2 – 60m sec or 219 kmh winds
- Canadian Western Red Cedar 18mm thick VJ cladding
- Pre-assembled panels for quick and easy assembly
- Heavy Duty Floor Kit available as optional extra
- 10 year warranty
- Delivery to your address available
- NOTE: WA, Qld, Vic and SA buyers, please check with your council before purchase, this studio is over 10 square metres.
List of dimensions:
- Internal Dimensions: 4716 x 3000 x 2575 Front x Side x Height (mm)
- External of Frame Dimensions: (Concrete Slab Size) 4800 x 3084 Front x Side (mm) (making slab smaller than cladding size gives a rebate, this allows rain to run off walls and not enter the studio)
- External Cladding Dimensions: 4848 x 3132 Front x Side (mm)
- External Roof Dimensions: 5168 x 3432 x 2725 Front x Side x Peak Height (mm)
- Door Opening Dimensions: 1850 x 1440 Height x Width (mm)
- Wall Height: 2020mm
Our cedar range comes with all the basics needs to create the lockup shell as shown in the images - doors, windows, hinges etc and all the hardware required to assemble it is included. You can however add several extra options and upgrades, ranging from a floor kit to assembly tools, details provided below on all of these.
Subfloor Kit: Highly recommended. The Floor Kit provides a very strong, long lasting base and also makes the install process very easy as the walls simply locate along the edges of the floor. Has several H4 treated stumps at 75cm long to allow for a slope. Uses water resistant yellow tongue sheeting system as the top surface, you can use as is or add a floating floor on top.
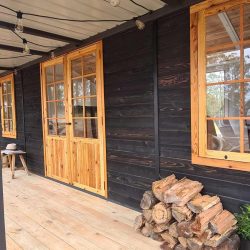
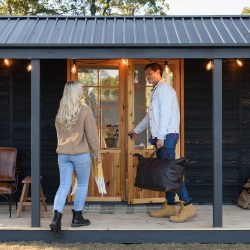
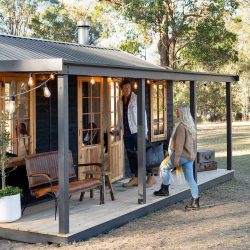
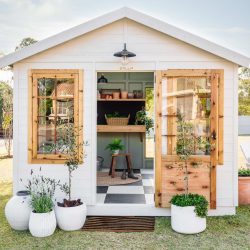
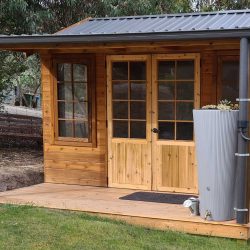
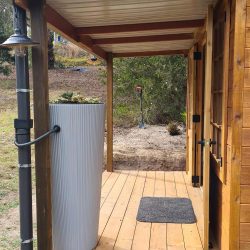
Annex + Deck: Highly recommended (Studios only) The Annex and deck option adds a lot of functionality to your studio. Gives shelter in the rain and a handy place to put a doormat to prevent dust and dirt entering your studio. A place to sit in the sun, place some planted pots and add one of our decorative rainwater tanks.
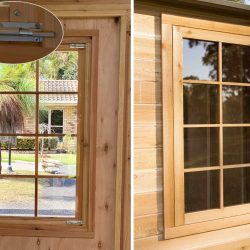
Extra Opening Windows: The standard opening windows are framed in cedar and use a lightly tinted acrylic, better than glass in many ways and indistinguishable from glass when viewing from inside or out. Comes with internal latches, its a good idea to add some sort of cabin hook so when open they do not move in the wind, we do sell those if needed.
Extra Fixed Windows: These are no longer available.
Extra Doors: You can upgrade to double doors or add extra doors elsewhere in the shed/studio. Please note in your order comments where the extra door should go.
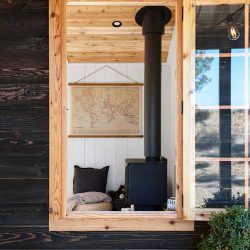
Skylight: Adds a translucent roof sheet to the roof, replacing a standard colorbond sheet, using the same profile. Great for artist studios or anyone requiring plenty of natural light. Can make the space hotter in summer, an AC solution can easily overcome that though.
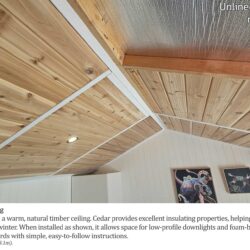
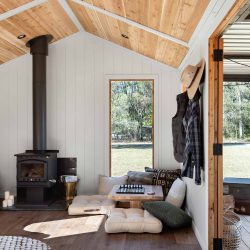
Cedar Roof Lining: The ultimate interior roof lining for your cedar studio is a cedar roof! Cedar will add extra insulation and can be left unstained and will keep its natural cedar look for years as there will be no UV light to fade it.
There are many ways to install this, we simply supply the cedar boards, you will need to trim them to the correct length. Can be nailed directly on top of the roof frame and a trim piece added to cover the edges or can be cut shorter and installed between the roof trusses, add some (42x33mm for example) timber framing behind it that you attach it to with nails. We can supply images of these simple install ideas if needed. A brad nailgun is highly recommended to make the install quick and easy.
Roof Colour: Choose a roof colour from our range, a swatch of colours is shown in the image thumbnails. If you need a colour that is not shown we can order in any colorbond colour that you need also.
Roof Insulation: Recommended Reflective foam cell foil adds an effective heat barrier to your roof, makes a huge difference in radiated temps from the steel roof. Installation takes mere minutes as its simply placed under the roof sheets during assembly.
Assembly Tool Bits: Recommended You will need to drill several 13mm holes in all the floor stumps, our auger bit drills a hole in a 90mm square treated post in about 2-3 seconds, a comparable, standard 13mm twist bit takes 5-10 times as long. Set also includes exact sized driver bits for all the supplied fasteners, an under or over sized driver bit risks rounding off the screw. (We recommend you use a cordless "Driver" instead of a cordless drill for our cedar range, a drill will still do the job but a driver has much more driving force and less "kickback" to your wrist as it uses a hammer action. Talk to us for advice on an affordable driver option if you don't own one.)
Door Handle Upgrade: Highly recommended (Studios only) Our house style, entrance lever is a great addition to your cedar studio. Spring loaded door lever with internal lock snib and 2 provided keys. Looks better than the shed style of standard handle and is of very high quality. Assembly is straight forward, same as any door handle, just requires 2 hole saw holes and it simply screws in. For a tidier appearance the side of the door can be chiseled out to recess the face of the lock. Comes with full instructions on how to do the easy install process.
Also available with this option is an install kit, 2 hole-saws and a forstener drill bit, all the exact sizes you need to make the install of this door handle very easy.
Ornate Hardware: (Sheds only) Upgrade to our cast iron, forged look, hinges and doorbolt. Double powder coated in black with a lifetime guarantee, these really look great against the cedar and add come with all screws etc needed. Includes a combination padlock so there is no key to lose and the entire set is very easy to install. Comes with 3 hinges per door for added strength.
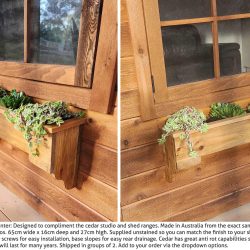
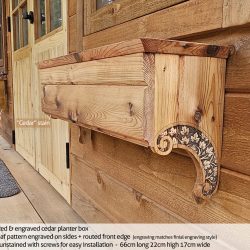
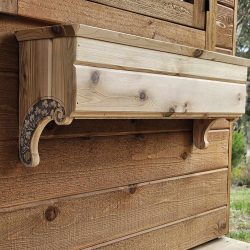
Cedar Window Planters: Grow some herbs, succulents or flowers on the walls of your shed or studio. Stylish and made from the same cedar as the sheds & studios. Easy to install, supplied uncoated so you can coat in your selected stain or paint. Custom sizes and styles available on request.
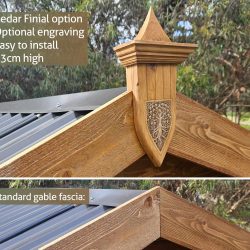
Gable Finial: Add a touch of style to your shed or studio with a cedar finial. Handcrafted in Australia with optional laser engraved design. Photos don't do these justice, they look even better close up in person. Supplied uncoated so you can coat in your selected stain or paint. Super easy to install with pocket holes screws in the back, supplied with a long driver bit to install.
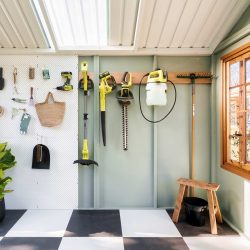
The 2.02 m wall height on the studio range is not high enough to require a habitable building permit, thus you only need to get a permit for these as a "shed", typical use for a shed can be: storage room, workshop, office or retreat.
Our studio range is still built to house quality in regards to strength and durability but the lower wall height means you only need to install these as a shed. Check with your council in regards to what paperwork etc they will need, we do have plans available if you need them. Usually all a shed building permit will require is a sketched site plan with dimensions showing boundaries, septic tanks and nearby buildings etc and the filling in of a simple form.
All states except NSW have a 10 square metre limit, under that you can install with no permit required, in NSW you can install a shed up to 20 square metres without requiring a permit.
The above is just intended as a quick summary, please ensure you check with your council if you have any concerns over your own requirements.
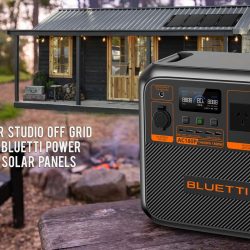
Our new range of quality power systems from Bluetti.
We chose Bluetti for many reasons, its one the the best quality units on the market, fully expandable - you can add extra battery storage or extra solar panels at any time, includes fast wireless phone charging on the top of the power station and they use standard connectors which means you aren't locked into using only Bluetti solar panels or accessories. Talk to us about all the features and which unit is best for your needs.
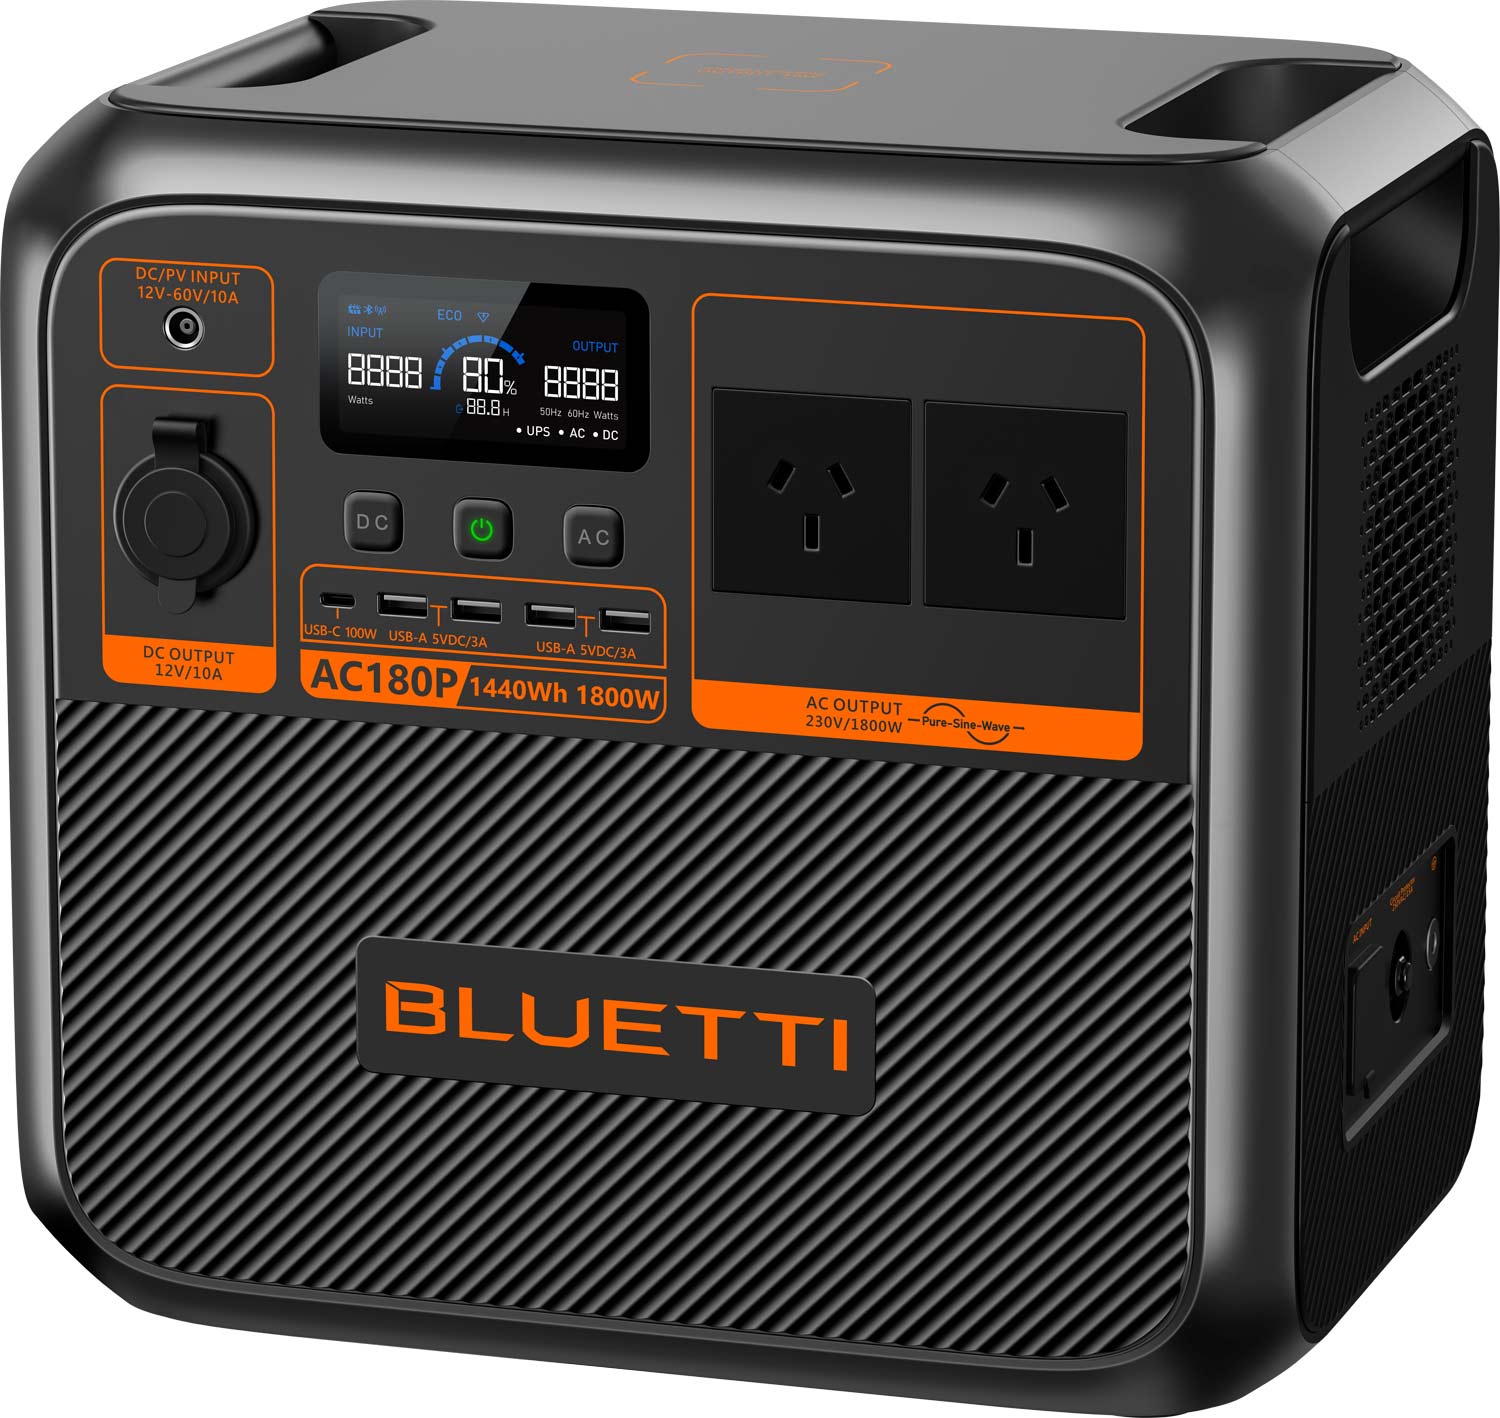
Power Pretty Much Anything. The BLUETTI AC180P has 1,800W available as constant output power and 1,440Wh capacity to cover most power demands. It also has a Power Lifting Mode that delivers 2,700W output to run high-powered devices effortlessly. A wide range of outputs, including AC outlet, USB-A, USB-C, 12V DC outlet, and wireless charging pad, are built in for versatility and for living off-grid or on the go. Has a 5 year hassle free warranty!
Can be charged from a solar panel or just plug it into an outlet in your house. Using the latest technology in Lithium Iron Phosphate batteries means the unit weighs only 17kg and is easy to cart around whether its for camping or into your house during a power cut.
Original price was: $1,699.00.$1,169.00Current price is: $1,169.00. Read more
 Add a solar panel to your power system.
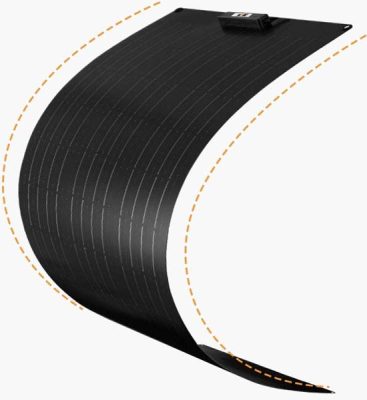
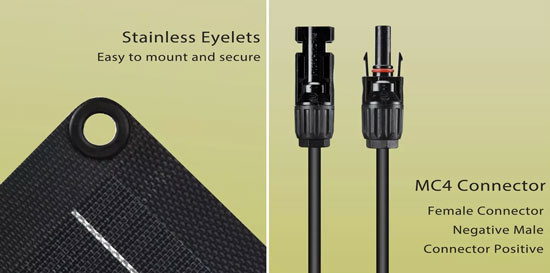
Designed to be to screwed or taped to your roof, these 400 watt panels can recharge your power station at home or when camping, an IP67 waterproof rating means they can handle all weather. Lightweight and strong, they have mounting holes along the edges. For extra power you can chain 2 or even 8 units together. They use industry standard MC4 connectors and they come ready to simply plug right into your power station. 1 year hassle free warranty.
We sell extension cable MC4 leads also, so you can wire these through the roof and down the wall, typically 5m should do that. We also sell tape designed to attach the panel to a Colorbond roof.
 These panels have a factory rating of 400 watts but we believe they are closer to a true 250-300 watts. Still a great panel and very well priced. We would recommend at least 2 for any Bluetti system over 1000 Watts in size but it can depend on usage. Call us to discuss your power needs, we will be happy to advise.
Dimensions:
- Unfolded: 1570mm x 770mm
- Weight: 3.3 kg
$249.00 Add to cart
Cedar coatings - click to enlarge
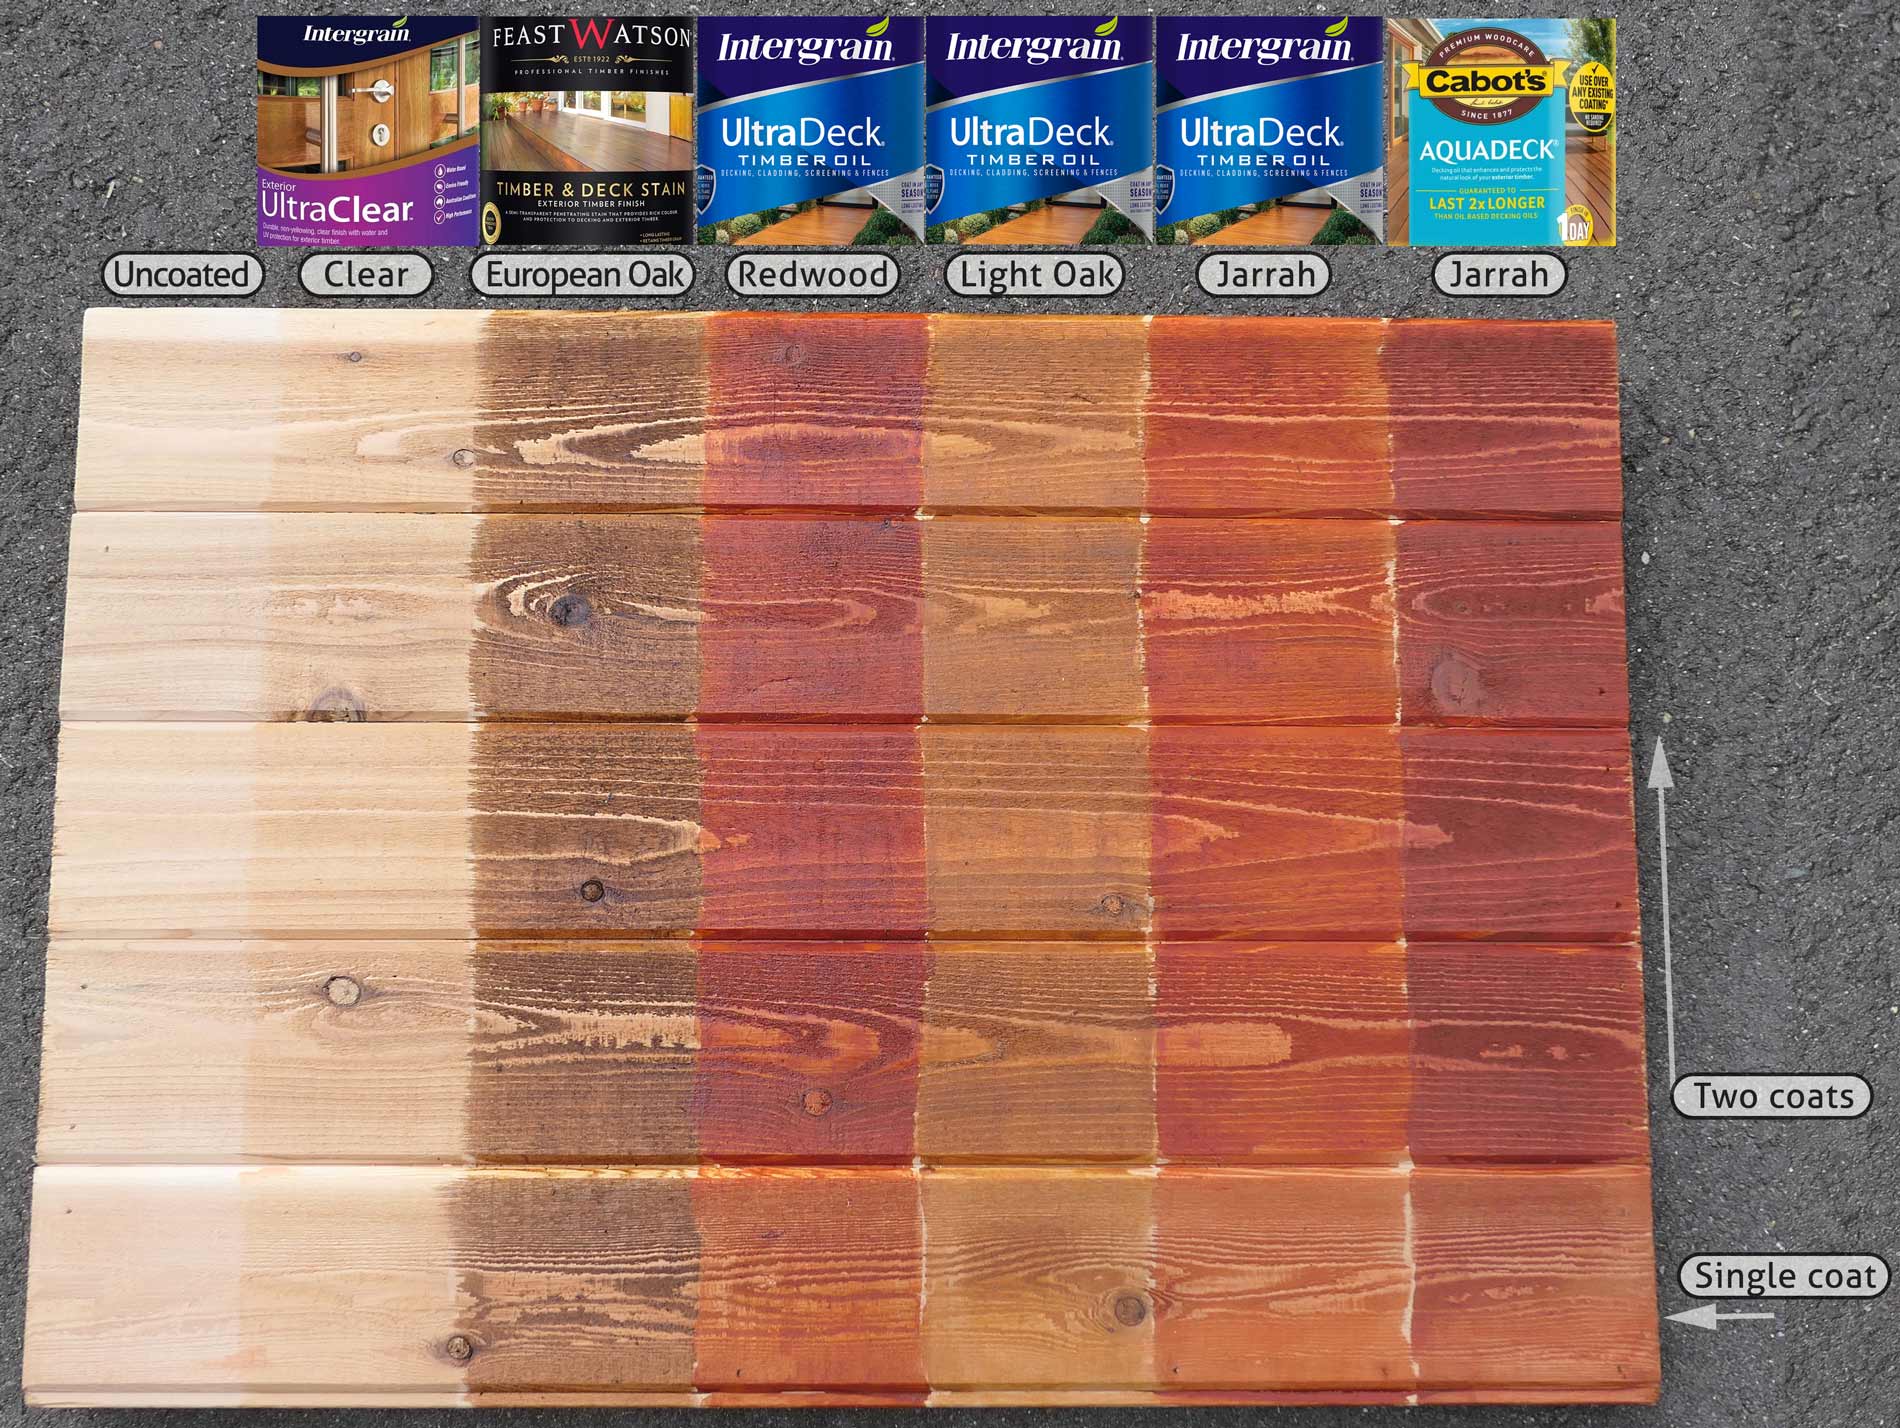
Cedar can be left bare, to naturally weather to a grey colour or coated in a range of oils or stains. Using a coating will give the UV protection needed to prevent fading or greying of the timber. We have applied 6 commonly used products to a test panel, shown on the right. We have a second photo, below, showing how the different treatments weather over time. We did one row with a single coat for all the products, this will give an idea of how things will look after they fade a little and some may even choose to do one coating.
Initial coating is best done with the panels on the ground, prior to assembly. This makes the job much quicker and easier. The best tool is a heavy nap roller with a long handle attachment. All products will require recoating after a time, typically 3-5 years.
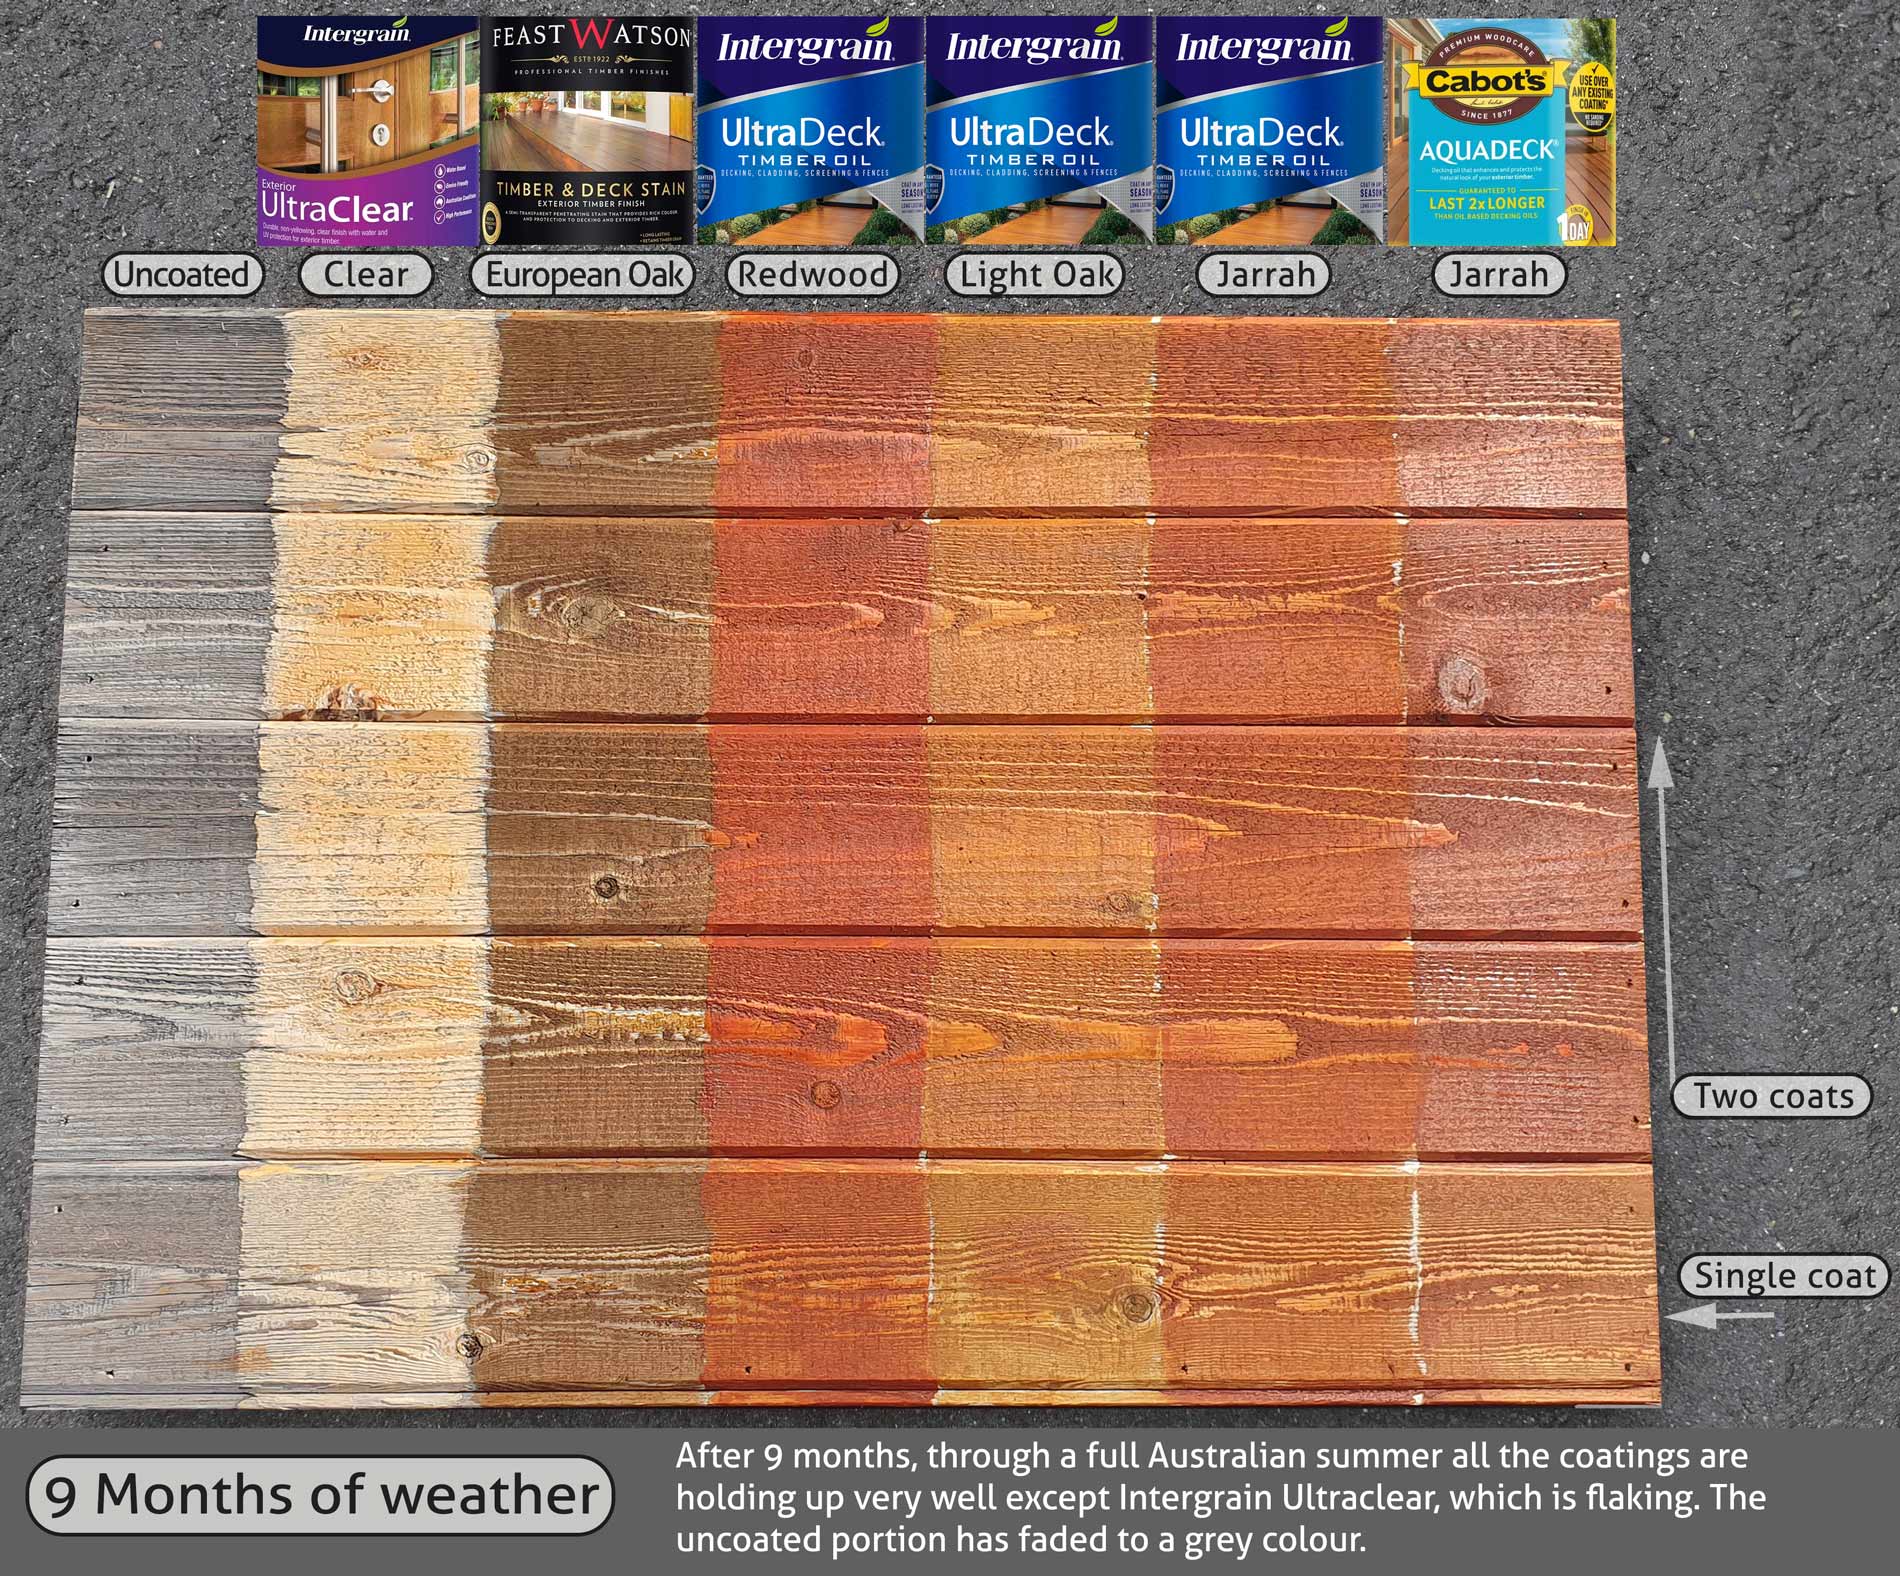
After 9 months of weather
We don't endorse any of the products tested but we do have some opinions: The clear coat from Dulux Intergrain, does look very nice initially but we have had feedback that is doesn't protect the underlying colour as time goes on and it can flake. One of our favourite colours is the Ultradeck Light Oak option, again from Dulux Intergrain, some of our shed/studio photos have been done with this stain.
Stains will change the colour of the natural cedar but they do preserve well, the underlying grain/pattern of the timber, the grain is one of the features of cedar, its patterns are much more pronounced than pine or other styles of cladding.
Painting is an option many customers have chosen also, you will lose the natural look of timber but colour choice and long term protection are the benefits with paint. Because of cedar's large pores, it is necessary to prime the wood before painting it also. Any acrylic paint will work, talk to your paint supplier about what they recommend.
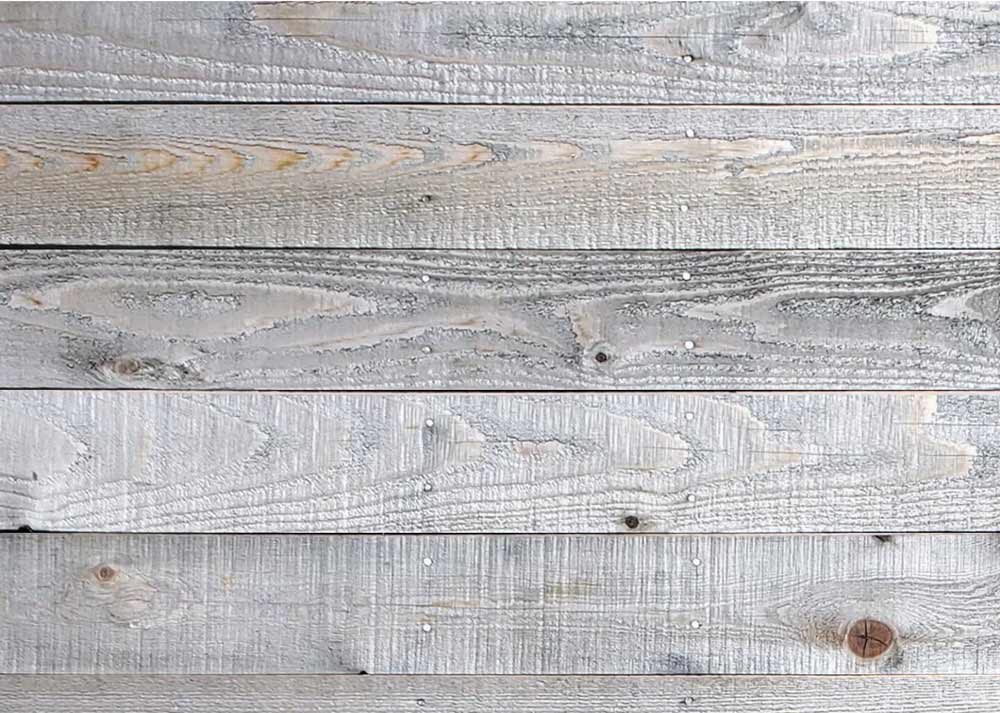
Weathered cedar - click to enlarge
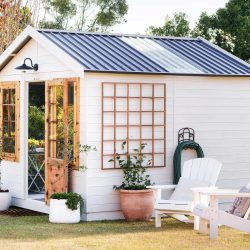
A two tone paintjob looks best with the doors/windows a different colour to the walls.
Unprotected cedar will fade to a grey colour fairly quickly, within a year or so. It will still last a long time, but will eventually decay one day. The weathering penetrates to about 2mm fairly quickly but then slows dramatically. Cedar deteriorates slowly due to the natural oils it contains: cedrine, cedrol, and thujopsene. These have many natural benefits from termite and bug repelling to medicinal properties to treat things like fungus.
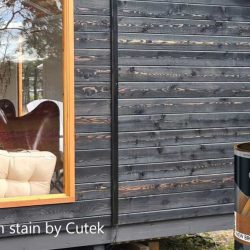
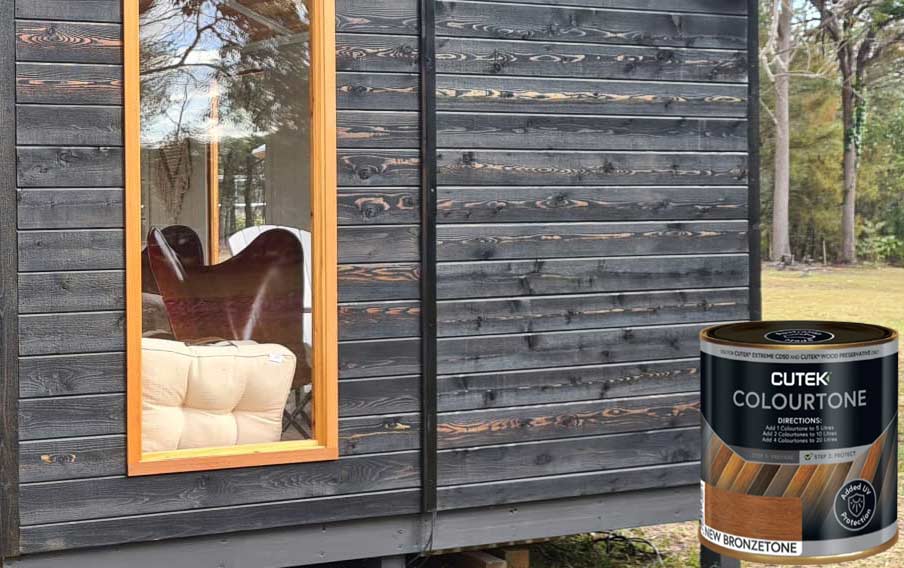 We recently coated a cedar studio in a dark stain called Black Ash, by Cutek. There are several photos of this on the Pioneer 20x10 studio page. This is a high quality product that is available at many paint suppliers Australia wide. It provides a great contrast on cedar timber due to the rich grain. Image on the right shows the Black Ash on our cedar studio Pioneer.
Some info about the cedar timber used on the range:
Western Red Cedar is highly durable and dimensionally stable, making it ideal for a wooden garden shed or studio. It has an excellent insulation value – the highest of commonly used softwoods. It is classified as ‘very resistant to decay’ and is rated alongside Australian timbers such as Jarrah and Red Gum in terms of durability. Inground stake tests in northern Queensland have indicated that it has a very high resistance to termite attack. Its dimensional stability reflects in the minimal movement and distortion caused by changing moisture content of the air – in fact, it has the best stability rating of any commercially used timber in Australia.
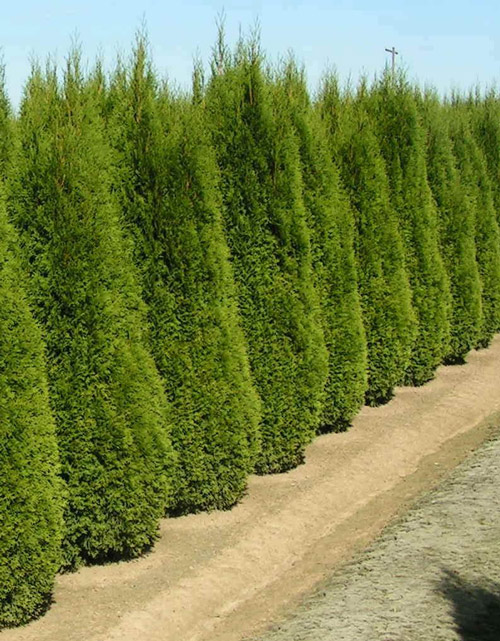
Cedar plantation
Western Red Cedar is an excellent choice for cladding of timber buildings. Classified as a softwood, Western Red Cedar is the lightest timber commonly used commercially. Its low density rating gives it an excellent insulation value. Its colouring ranges from a light straw colour through to warm reddish or dark brown. Importantly, Western Red Cedar exhibits good long term performance in demanding environmental conditions.
Western Red Cedar (Thuja Plicata) grows on the west coast of Canada in British Columbia, and in the coastal area of Washington State in USA, where it reaches heights of 45 - 60 metres. Although it is not botanically related to the Californian Redwood, it does have many similar properties. The Redwood however is much more expensive and would not normally be used for external cladding in Australia.
The harvesting of Western Red Cedar in British Columbia is closely controlled and monitored. Much of the Cedar growing along the coastal region is actually in parks and protected areas, and consequently is not commercially accessible. There are areas designated as "working forests" from which the timber is taken, and this, along with "second growth" timber which is coming on stream contributes to the approximately 6 million cubic metres harvested annually. This amount has been determined to be sustainable in the long term.
Do I need to stain/paint my cedar studio?
We would recommend staining or painting your cedar studio to maintain its fresh looks. Not doing so however, will not comprise the studio’s durability but you will start to see the cedar weathering over time to a silvery grey colour, if left uncoated. We have a full write-up on each studio page that expands to show a lot more info on cedar coatings.
Can I change the colour of the roof?
Yes, however there is an additional cost. If the standard monument roof colour does not suit you, you can choose a colour that does from our list of options.
Do I need a concrete slab?
We recommend purchasing the heavy duty floor kit if you do not have an existing slab. If you don’t have an existing slab the heavy duty floor will save you employing any expensive contractors to do earth works or lay concrete slabs. The heavy duty floor kit comes with a 140x35mm h3 pine base suspended on 750mm h4 posts that sit in the ground. The heavy duty floor kit is ideal if your ground is uneven. If your ground is very out of level, you may need longer posts, if this is the case give us a call to discuss your needs or let us know in the comments when you order.
How do I fix my shed to a concrete slab?
Use 1 concrete anchor per panel join, fix through the panel base plate into the slab.
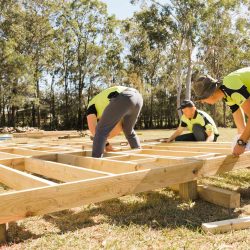
Are the studios easy to assemble?
Our cedar studio kits are a very enjoyable DIY experience for those with a little hands-on experience. The kit comes as a flat-pack of pre-made panels and timber parts that can be screwed together and installed easily with the guidance of our instruction manuals and install videos available online. However, if needed any local handy-person can assemble these. Places like www.airtasker.com.au are a good way to find someone. We do also know of some installers in the capital cities.
Does it matter if my site is not level?
No, the heavy duty floor is going to be the most efficient and affordable base for your shed and comes with posts to level it up. If your ground is very out of level, please give us a call (see number at bottom of page) to discuss your needs or let us know what you need in the comments on your order.
Are termites a problem and if so will the warranty cover this?
We are 99.9% certain your studio will never be attacked by termites. All framing used is treated pine and the cedar is naturally termite resistant. If you ever have issues with termites attacking your studio this is all covered by our 10 year warranty.
If I order today, when can I expect my studio to arrive?
Please check the freight tab on the product page for current lead times and further details on delivery.
What happens if my studio arrives damaged in transit or missing parts?
In the rare and unfortunate circumstance that this happens, send us a quick email with your order number, a photo of the damaged parts or a list of the missing parts and we will have replacement parts dispatched in most cases within one business day. These issues take priority over any other enquiry and are acted on promptly.
The video below shows a quick overview of some of the assembly steps and a walkthrough of a Barakula studio setup as a potting shed.
Gallery
Browse a selection of our studio images below. These images are of various studio sizes and may include options not supplied with the studio you are purchasing such as additional windows, floor coverings, paint etc.


Reviews
There are no reviews yet.